Getting Started
The getting started section is still a work in progress. It covers much of the process you need to go through, but it is incomplete and needs a bit more work before you can simply “follow the directions” to get everything working. If you need help, please join the Lumensalis Discord Server
How would you like to get started with the LCPF?
-
Easy mode : Follow our Quick Start Guide, which contains
- a list of all the parts you need to start adding effects to
your project with the LCPF
- and where you can buy them
- based on the TerrainTronics Caernarfon Castle Kit and the Lolin S2 Mini
- a list of all the parts you need to start adding effects to
your project with the LCPF
These are general directions for getting started with the LCPF.
If you want a guide for getting started as easily as possible, quick and easy set of specific instructions, for your controller, see Supported Controllers.
Complete Initial Setup on your controller
- Install CircuitPython and the TerrainTronics bundle on your controller.
- TODO: more detail / better instructions for this
- for now look at details for your controller under Supported Controllers and then Initial Controller Setup
- The rest of the instructions below assume that this has been done, and you have a working CIRCUITPY drive
Setup a supported editor
WARNING: Not all editors work well for CircuitPython1. Starting with Mu or Thonny is highly recommended unless you are already familiar with Python, USB serial device access, and ESP32 development or VSCode.
- Mu
- Python editor for beginners with CircuitPython support
- Thonny
- more flexible than Mu, less complicated than VSCode
- under Tools / Options / Interpreter select
CircuitPython (generic)
- Visual Studio Code
- more complicated IDE, works well if you’re already familiar with VSCode
- useful extensions
Setup a USB serial console interface
You need the ability to see console text output (error messages, print statements, …) from your controller. The editors listed above (with proper configuration / extensions) already have this built in. Otherwise, you need a terminal program that can connect to a USB serial device.
code.py
CIRCUITPY:\code.py is a very special file. It is loaded and run each time your controller starts (or restarts)2
Uploading your code
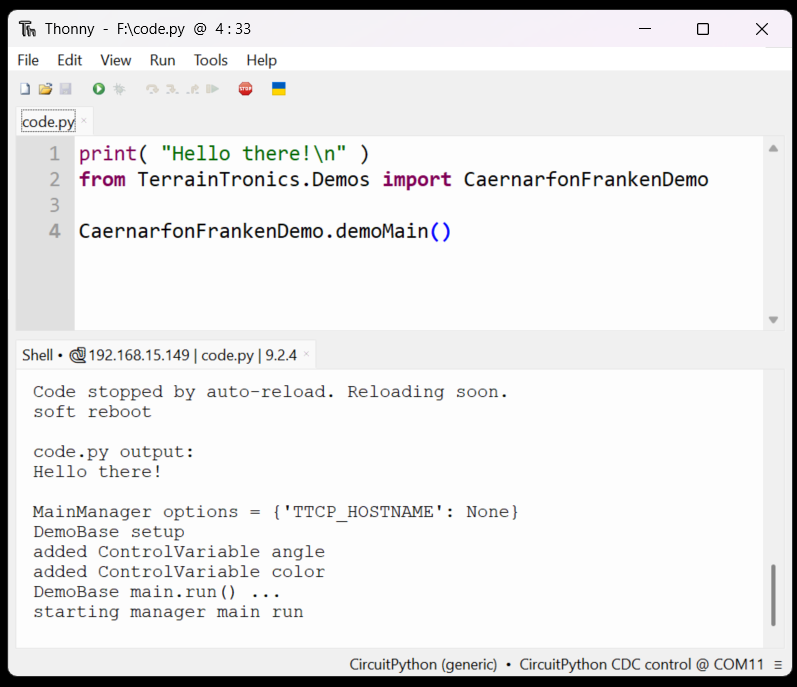
For a controller running CircuitPython with a CIRCUITPY drive, simply saving your changes to CIRCUITPY:\code.py (or any other file on your CIRCUITPY drive) is all you need to do1. There is no separate “firmware upload” step required. For example, here’s what you’d see saving
print( "Hello there!\n" )
from TerrainTronics.Demos import CaernarfonFrankenDemo

CaernarfonFrankenDemo.demoMain()
to CIRCUITPY:\code.py with Thonny :
Playing with Demos
There are files for demos In CIRCUITPY_DRIVE__:\libs\TerrainTronics\Demos_
CIRCUITPY_DRIVE:\code.py is a file that gets automatically run when the controller boots
There are a number of ways to run a demo. For example, to run CaernarfonLavaLights (at CIRCUITPY_DRIVE:\libs\TerrainTronics\Demos\CaernarfonLavaLights.py ), CIRCUITPY_DRIVE:\code.py could look like
from TerrainTronics.Demos import CaernarfonLavaLights
CaernarfonLavaLights.demoMain()
or you could copy the contents of CIRCUITPY_DRIVE:\libs\TerrainTronics\Demos\CaernarfonLavaLights.py into CIRCUITPY_DRIVE:\code.py and add demoMain()
# copied contents from CaernarfonLavaLights.py ...

demoMain()
at the end
Notes
Footnotes
-
Not all editors save files “properly” when using a USB device. Files can get partially written and/or take a while before the changes are actually written to the drive. See Adafruit’s Recommended Editors for more details. ↩ ↩2
-
Technically it isn’t always run - if the code in your controller crashes, it can go into “safe mode” which causes it to skip loading code.py on the next reset.running on ↩